Getting Started with Checkpanel
Checkpanel lets you manage checklists which are meant to be checked frequently. You can write extensive documentation on each list item so that you or a team member can easily know what exactly should be checked. Confirming a successfully checked item is just a matter of clicking on a large button. When a check fails, you can also supply some more detailed information about the nature of the failure - for documentation and/or so that your team member know what's wrong. At any time, you can see a complete history of past reports for each item.
To get a more complete overview of all features, take a look at our features page.
Checkpanel is designed to be easy to use, so you should have no problem exploring all features by yourself. If you prefer a more extensive introduction, though, read on...
Creating your first checklist with items
Checkpanel offers a flat hierarchy. You can create checklists and each checklist contains the items which are to be checked.
To get started, click on one of the buttons labeled "Add new checklist" on your checklist index page. Then enter a title for your new checklist and click on "save".
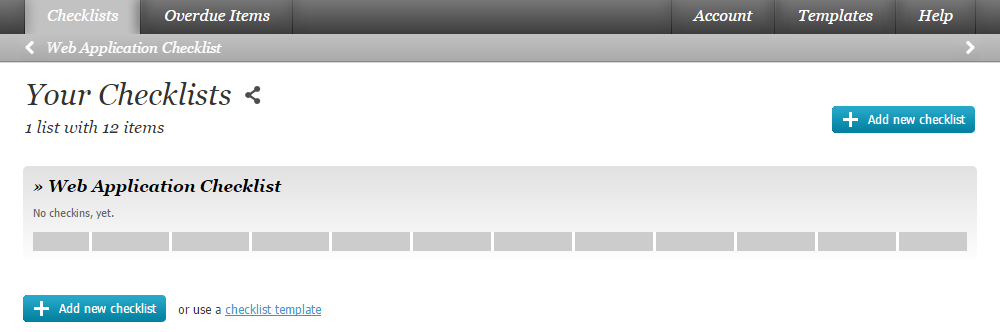


Of course, your new checklist is still empty. Proceed to add items to fill your checklist with life. Just click on the title of the checklist to open it. Then click on "new item" to add a list item.
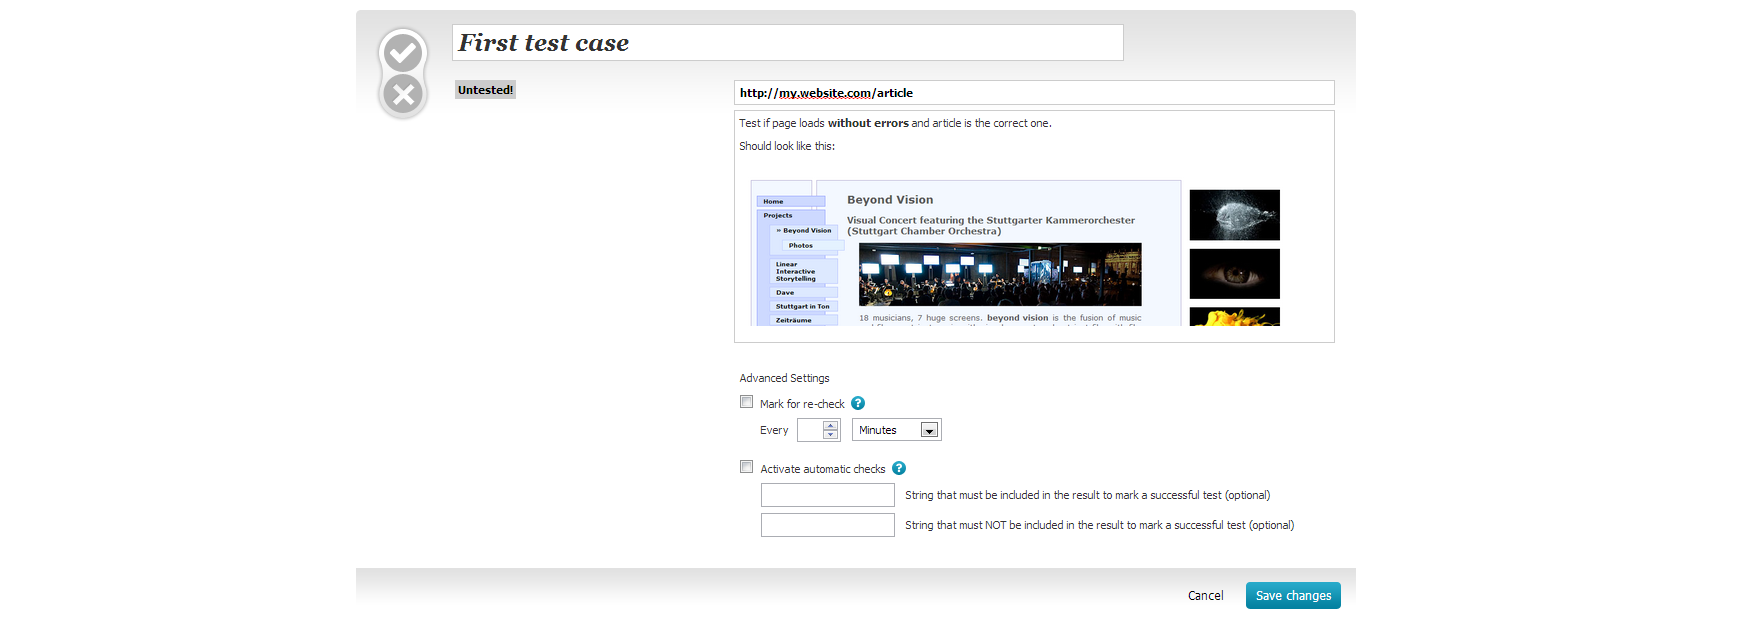
You can now enter all the information you desire about the item:
- Title
Choose an expressive title to make your item easily recognizable. - URL
If your test is associated with a certain webpage, you can enter the URL here. If you click on it later, it will open in a new window with a Checkpanel toolbar which helps you to report your results faster and navigate within the checklist.
You can also leave this empty if there is no relevant URL. 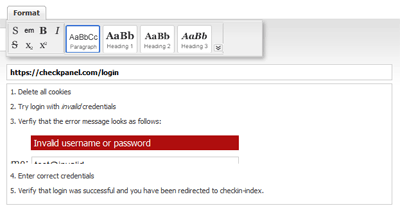 Description
Here you can - if you want - add more information about the test. If you are working in a team, you might want to write down the detailed steps of the test so that every teammember knows clearly what to do.
You can format the description with the included editor interface to give it more structure. You can even paste pictures from your clipboard.
You can also leave the description empty if it is obvious what is to be tested.- Reminder
You can activate a reminder for each item. Items which have not been tested within the set interval will show up under "Overdue items". You can also filter your checklist to see only overdue items within it (more about filters later). - Automatic checks
If you activate automatic checks, Checkpanel will frequently test the URL you provided to see if it still woking. If not, you will be notified.
» more about automatic checks
When you're done, click 'Save changes' to save your new item.

If you supplied an extensive description, it is displayed shortened at first. Click on "more" to view the full description.
If you want to edit the item again, just hover over it and click on the pencil icon. You can also delete or duplicate each item using the corresponding icons.
Working with checklists
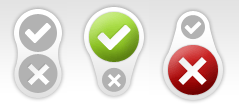
Once you have filled your checklist with items, it is time to get testing. At the left side of each item is a button which shows it's current state (untested / successfully tested / test failed). It is also used to report the results of your checks.
Checking in
Reporting a successful check is quick and easy. Just click the check mark which shines green on hovering over it. Done. Your check is recorded and added to the history.

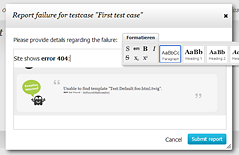
If you discovered a problem during your test, click the button with the 'x' which shines red when you hover over it. A dialog will open where you can enter additional information about the nature of the problem. You do not need to enter anything, but we recommend to add at least a basic description for future reference. If you are working in a team, enter as much information as possible so that your team mates don't have to bother you asking for more details.
As with item descriptions, you can format your report and paste images.
Once you are done, press "Submit". Your report is recorded and added to the history. If other team members have access to this checklist, they will be notified via email about your report. The reported failure details can be viewed by clicking on » view failure details.
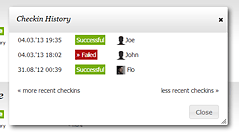
Each reported check is stored in the check history of the item. If you want to see who reported what in the past, just click on » History and a window with all past checks will be opened.
For past checks which have failed, you can also view the failure details. Just click on » failed and the usual window with failure details will open.
Ordering items and checklists

New items are always added to the bottom of the checklist. Existing items and checklists can easily be ordered by dragging them to the desired position. To drag an item or checklist, click and hold on the move-icon as depicted in the screenshot to the right.
If you change the position of an item or checklist, it will be changed for your teammates as well.
Filtering displayed items
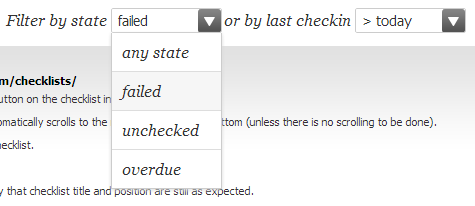
To get a better overview of larger checklists, you can filter which items should be displayed. You can filter by state and by the time of the last check.
For example, you can choose to display only failed items. Or you can display only items, which have not been checked today - for example because you changed something and now want to test everything again.
Filter settings are not saved and not synched with other teammembers.
Using the Checkpanel toolbar
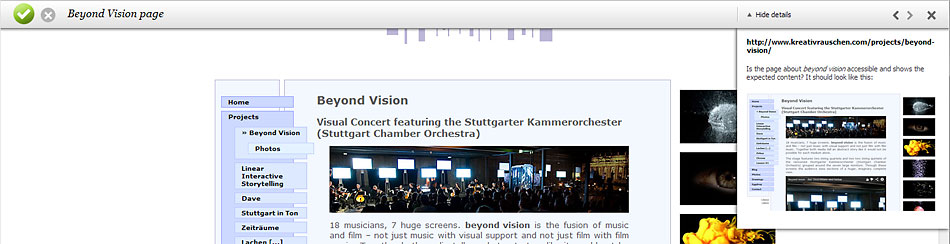
If you stored a URL with your test case, it will open in a special view which includes a Checkpanel toolbar. This allows you to quickly report your results, view the test description and navigate to other items without having to switch browser windows.
If the item description obscures too much of the webpage, you can hide it. You can also remove the toolbar alltogether. Use the arrows to navigate to the next or previous item of the same checklist.
More?
We hope we have covered all questions regarding Checkpanel. If something is still unclear, or if you have suggestions for improving Checkpanel or this documentation, please contact us.
Thanks for using Checkpanel!